Project 22: Framed cross stitch

Posted on December 6th, 2011 by Maddy - 2 Comments

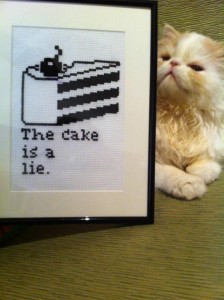
The Cake is a lieOur lovely friends are leaving London -boo. But essentially, in my head, by moving to Devon they WILL be living at River Cottage. Which makes me a) quite jealous and b) invite my self down to stay in the new year.

So, to send them something fitting to put in their new Kirstie Allsopp-esque farm house (again, this is all in my mind), I decided to make them a framed cross stitch pattern.

Here is their cat, Betsey, looking quite proud. So for me if it is a hit with the cat then I did OK.  I clearly deserve a slice of cake and a listen to Still Alive.


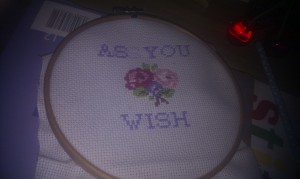
Learning to Cross Stitch or stitching cool phrases into things.

Posted on December 6th, 2011 by Maddy - No Comments

Ass you wish

After my first ever trip to Hobbycraft I picked up an embroidery loop, a huge bag of coloured thread and the cross stitch book, Stitch! . This truly is the mecca of craft and I even managed to pick up a tea pot shaped cookie cutter – truly awesome.

I’ve since discovered some amazing cross stitch patterns online, especially truly geeky Doctor Who ones. I’m definitely planning to cross stitch a dalek at some point.

I’ve discovered that the key to making things using cross stitch is to stick a phrase on it. Suddenly it lifts it from being a bit naff to uber cool. This is a good lesson in all future craft projects – and once you get used to stitching letters it is a lot easier than a picture.

I’ve been using an invisible pen to help me mark out where to stitch.  After my boyfriend corrected my kerning, the self proclaimed typographical Nazi,  it some what altered the meaning of my favourite Princess Bride quote.

The invisible pen is taking longer than expected to fade…..

Project 21: Apple cosies

Posted on November 12th, 2011 by Maddy - No Comments

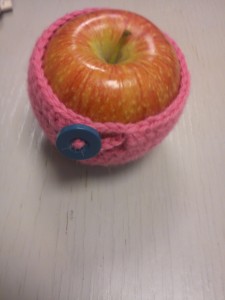
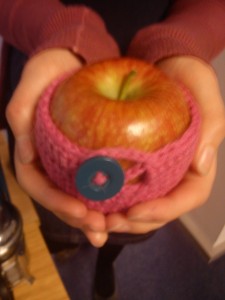
Apple CosyI made this apple cosy for my friend Sarah. It means her apples will never be cold again, and it can sit nice and toasty on her desk until lunch time.

It wont roll away in it’s little alpaca coat, and it can be used again and again.

And some people said it wasn’t ‘practical’.

You can make this from the Guardian’s make page and it is quick and fun. I find it easy to crochet in a round, and doing this project also means this practice will give me preparation if I wanted to start doing any amigurumi crochet.

One person said to me; “don’t worry, I’m sure we can find another use for it”.

Clearly they just don’t get it.

In response to the many who would pose the question ‘Why?’, ‘What is the point?’, ‘Do you have a lot of time on your hands?’, I present three reasons below.

Three reasons ‘why’:

  1. Because apples get bruised in your bag – and that is not fair on the apples.
  2. Because even Granny Smiths get cold in the winter.
  3. Because Willy Wonka once told me “Oh little nonsense now and then is relished by the wisest men”.

Project 20: Flower ring

Posted on November 12th, 2011 by Maddy - No Comments

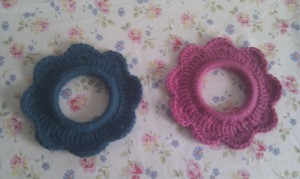
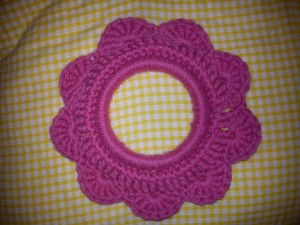
These flower rings are a really easy quick project to do. What I like about them is that by wrapping the yarn around a bangle it keeps a really nice shape. I find it hard sometimes for my crochet to look neat, and this definitely helps.

I discovered this pattern from Molllie Makes issue 4, but you can also read it on Lola Nova’s blog, which is a lovely blog.

Whilst making this some people were a bit bemused as to its purpose, some assumed it was still going to be used as a bracelet and not a wall hanging.

So far my attic flat has left me in a position of not having enough straight walls to stick these up, but they were a really lovely project to do.

Now I’ve used all the bangles I own, so I will need to purchase more if I want to have a third one to complete the set. And some more to wear I guess.

Project 19: Baby crochet blanket

Posted on November 12th, 2011 by Maddy - No Comments

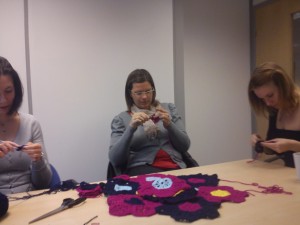
A few months ago, our weekly Wednesday work knit club embarked on an ambitious project for our friend. She was expecting a baby and wanting to give her something lovely, we decided to crochet a blanket for her.

Using  a waggon wheel throw pattern, from my Rowan Crochet Workshop book, we started making the little wheels in various colours. At that point we had no idea that she would be having a beautiful baby girl. Hence, the blue and pink themed blanket.

Many weeks later, we had finally made enough wheels to start thinking about the laborious job of stitching them together.

Founding member of the knit club, Ayesha, had the inspired idea to turn them into flower shapes. This made it a lot easier to mix the odd numbers of different colours together, and looked much nicer than a random arrangement.

At this point we needed to get this blanket finished fast, so each of us took wheels home to stitch together. Sophie received some rather odd looks crocheting on her morning commute from Milton Keynes.
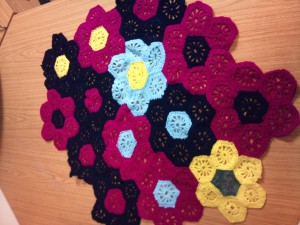
With the baby already arrived, Camille arranged an emergency knit club that resulted in us staying till half seven in the evening getting the final pieces stitched together. With the help of Sarah’s super speedy wheel making, we even managed to do a few more wheels to make an even bigger blanket.

We finally completed it and popped it in the post the next day. Luckily baby and mother loved it and it was all worth it. Hurray for happy babies!
Project 18: Strawberry pincushion

Posted on September 11th, 2011 by Maddy - No Comments

Strawberry pincushionI’ve recently discovered a great craft magazine, Mollie Makes.   Reading it induces the same kind of pleasure gained from drooling over recipes in food magazines, I’m mostly thinking Jamie’s magazine here.

Mollie Makes is full of sumptuous photographs of crafts that often, like the felt biscuits,  look good enough to eat! Having watched the magazine episode of the Apprentice I’m keenly aware that these magazines are purely created to target a demographic of interest to advertisers, but jeez – they do have such lovely shiny pictures.

Needless to say, this new magazine has inspired me to make my most recent project; strawberry pincushions. The method is super easy – just cut your fabric out in a circle the size of a CD, fill it with sand and some stuffing, and stitch some ric rac around the top.

There is a similar method on the guardian or else you can find it in the second issue of the magazine. It can get a bit fiddly but they are a nice little project to do. My poor pricked fingers would recommend using a thimble.

Project 17: Maddy and Matt make a record clock

Posted on August 13th, 2011 by Maddy - 1 Comment

Contrary to popular belief, it’s not all florals and kitsch chez Maddy and Matt. So when we decided a new flat needed a new clock, we made a record clock. For the clock face we used a  scratched and well used Simon and Garfunkel record and an old Jack Daniels clock that we didn’t want any more.

How to make a record clock:

Matt destroys the old clockStep 1:

Spend time going through your record collection to find one that has a design that allows you to see the hands easily.

It is a tough choice; you need to choose a record that has meaning to you without destroying one you like to play. We were lucky that Simon and Garfunkel’s Greatest Hits had a bloody big scratch on. You should listen to them now and pay tribute to their greatness.

Step 2:

Find an old clock that you don’t mind destroying. Let’s just say this Jack Daniel’s one had been bugging me for some time.

Step 3:

Render your record unplayable. Using a knife. We scratched the middle hole of the record to make enough room to push the pieces of the clock through. We had to do it: there was no choice. If you look closely you can just make out Matt’s tears.

Step 4:

Take the hands off the clock so that you can push through the ‘metal bit’ and reattach the hands on the other side.

A finished record clockStep 5:

Hang your clock up and enjoy having something that tells the time and makes you think about some great hits. See he looks happy now – they were tears of joy!


Project 16: Patchwork cushion (or Maddy makes yet another cushion cover)

Posted on August 13th, 2011 by Maddy - 2 Comments

Patchwork CushionAn avid reader of Maddy’s craft corner, of which  there are three, will be wondering why there hasn’t been an update on the Knitting Bag I started in March. In answer to your urgent cries, this project became a patchwork cushion after realising I would have to:

a)  make 60 hexagons,

b) source round handles,

c) own another bag I didn’t really need after all.

These are the steps I followed to make this cushion, though I used Sew! for initial instructions.

Step1: Cut out paper hexagons – many.

Step 2: Place the paper over the fabric and cut 1cm bigger than the hexagon. You then need to fold over and tack  the excess fabric onto the paper. Repeat many times with different fabrics.

Step 3: Stitch the hexagons together till you have enough for the front panel of your cushion.

Step 4: Remove the paper by cutting the thread you used to tack the paper onto the fabric.

Step 5: Make the cushion – I used the same method to make this cushion where you have  two rectangle pieces  for the back that slightly overlap. There is a cushion ‘how to’ on the Guardian’s Making Time blog, though I didn’t bother with ribbons or buttons.

I’m looking forward to getting my hands on Patch! as it will probably have better ideas for patchwork in there too.


Project 15: Sunglasses Pouch

Posted on June 24th, 2011 by Maddy - No Comments

Sunglasses CaseI have a habit of sitting on, and flinging off, my glasses which leaves me with noticeably crooked frames. In an aim to keep my sunglasses from the same fate as my everyday glasses, I’ve made them a pouch.

I got the idea from a ‘quaint’ YouTube  guide from Hanky Style, where they make a soft glasses case from silk Handkerchiefs. I used some fabric from an old dress instead and used their video as inspiration. It was really easy to make and it is really helpful that you can make the size of the case to fit the exact size of your glasses.

Now I have no excuse for not looking after my glasses- hopefully I can keep this pair straight.

Project 14: Bunting

Posted on May 28th, 2011 by Maddy - No Comments

BuntingI suppose I would be letting my “fan base” down if I didn’t get around to making some bunting at some point – So here goes!

This was made using up the fabric that I had left over from previous projects and a bit of help with some red ribbon. I used a video from thread banger for some basic tips, and then after much cutting and ironing I stiched it all together. Helpfully, the length was just enough to hang above my kitchen window.

When I told my boss I had spent my weekend making bunting,  he quizzically asked ‘ did you make it for an event or a party?’  I had to sheepishly answer; ‘Nope, just wanted to make bunting’.